Friday, January 01, 2016

Writing a simple database in rust, part 1

A Simple and Efficient Implementation for Small Databases is an old paper that I've wanted to implement for a long time. It describes a simple application that embodies a lot of "systems" knowledge at the same time:
  • Using the filesystem as a persistence and synchronization mechanism.
  • Using a write-ahead log as a source of truth.
  • Creating crash tolerant (or crash-only) systems.
While ideally you'd want to write this in C or C++, mucking around with strings and files isn't a very pleasant experience unless you are willing to pull in some third party libraries. Fortunately, in 2015 there is a langauge that is great for systems programs which ships with good libraries and offers several high-level constructs that make writing systems programs a pleasure. I've been playing around with Rust and it seems like a good tool for the job.
The paper describes a key-value store with granular locking, write-ahead logs and snapshotting (log compaction). It then describes a Chubby/Zookeeper precursor built using the system. My aim is only to implement the former (for now). I will also try to add some ideas from more modern systems, like immutability, if I have the time and inclination.
The aim is to start from a very naive implementation that works and then make it more idiomatic, or have better names, or add performance improvements.
This first post covers creating the in-memory key-value store and the write-ahead log without compaction. Along the way we'll take a look at the design choices and how Rust helps to write safer programs.

The in-memory key-value store

Code
The in-memory KV store is really easy to implement in Rust. A built-in HashMap and generics makes it very similar to C++ or Java. Ignore the extraneous imports and the impl Drop for SimpleDB..., they are remnants of some experiments. The Path and I/O related operations follow in the next section.
In true low-level goodness, our database will operate only on arrays of bytes. There are no length restrictions on the size of either keys or values. A Vec<u8> captures this.
Our library exposes only one public struct, SimpleDB.

type SimpleCollection = HashMap<Vec<u8>, Vec<u8>>;
type Records = Arc<RwLock<SimpleCollection>>;

pub struct SimpleDB {
  records: Records
}

We do want users to be able to use the same database from multiple threads. Rust's thread-safety is a diamond-in-the-rough for those new to the language. It demands a lot of thinking when designing the program (and grappling with weird errors sometimes), but when everything is shaken out, it makes sense and you get strong guarantees that there aren't data races waiting to happen.
We are going to skimp on per-key locking for now and lock the entire database for any operation. Inefficient, but simple. We will also only use a read-write lock unlike the read-update-exclusive lock used in the paper, simply because it already exists in the standard library.
When I started hacking on this, I wondered why locks and mutexes needed to be wrapped in Arc when they were supposed to be thread-safe on their own. It is because the lock itself is separate from the data it guards. Locks and mutexes provide safe internal mutability on the data they guard. They do so by leveraging the Rust ownership rules so that only one thread can ever acquire the contents for mutation. But the lock instance itself is also shared between threads. The rust compiler requires all objects to only be owned by one other object. The language provides various escape hatches that internally dip into unsafe code. The intention is that those hatches are vetted for safety while requiring higher level code to conform to strict requirements. For an object (in this case, the lock) to safely be 'owned' by multiple threads, it is wrapped in an atomic ref-counting pointer that will ensure that the lock itself is only deleted once, when all threads have released it. These are the sort of mistakes easy to make in other systems languages that Rust catches at compile time.
We also make sure that SimpleDB can be used on multiple threads:

unsafe impl Sync for SimpleDB {}
unsafe impl Send for SimpleDB {}

There is actually no need to make this explicit. The compiler can infer that all the members of SimpleDB are themselves thread-safe, so SimpleDB is too.
How Rust captures thread-safety via traits is fascinating, but too big to cover here in it's entirety. I recommend reading the concurrency chapter in the book.
We expose a static "constructor" open() that does some other things and then create()s and returns an empty database.

let db = SimpleDB {
  // ...,
  records: Arc::new(RwLock::new(SimpleCollection::new()))
};
Ok(db)

The get() method acquires the underlying HashMap in read-only mode and returns a value if it exists. Rust's Option<> struct captures the possibility of emptyness and provides several "Promise-like" combinators to make decisions based on empty or non-empty.

pub fn get<S: Into<Vec<u8>>>(&self, key: S) -> Option<Vec<u8>> {
  self.records.read().ok().and_then(|guard| guard.get(&key.into()).map(|val| val.clone()))
}

The lock's read() getter may fail if the lock is poisoned, so it returns a Result. RwLocks get poisoned if a writer panics while holding the lock. I found this idea fascinating, but we will ignore it for now and use some conversions to get access to the lock's guard. As long as the guard object stays alive, the lock is read-locked. guard also acts like a smart pointer (by implementing Deref) so we can call get()
The put and delete operations are similar. We acquire a write lock and insert or remove keys from the hash table.
In all these operations, we alias io::Error to our library's exported Error type. My error message Boo isn't very useful either. We'll leave this as it is for a while, and look at maintaining a Write-Ahead Log next.

Adding some disk operations

This is the revision of code used for the following section.
A write-ahead log maintains a record of mutations on disk. The change is only reflected in memory after it is written to disk. This allows recovery to the last known consistent point from the application's point of view in case of a crash. Production ready databases allow tuning how often the write ahead log is fsynced to save on disk I/O cost vs. possibility of losing data. We do no such thing, every mutation will be fsynced.
Users of our library will pass a directory name to the SimpleDB constructor and all our I/O operations will be performed on files within this directory.
let mut db = try!(SimpleDB::open("data-dir"))
Notice how we use Rust's traits to accept anything that is willing to convert to a reference to a Path. The Path type is unsized and meant to be used as a pointer. The PathBuf is sized, owned and mutable. The AsRef<Path> allows users to pass a PathBuf, a string or any custom type willing to deref to a Path. We then try to create the directory. Once that is done, we create an instance of the Log. The Log constructor creates a writable, append-only operations.log.
The lack of a null value in Rust leads to a pattern of creating fully initialized objects whenever possible. In C++ I'd leave several fields as nullptr in the constructor, then have setters. Anybody using those fields would have to check for non-null to avoid crashes. This often meant forgetting to check something and leading to lower quality software. In Rust you are either forced to have a Option<> member, which the compiler will force you to deal with at all callsites, or to use a builder pattern to set up even a complicated object as fully initialized. While more cumbersome when writing, it leads to safer code and nicer APIs.
Who should own the log? Since the log should also be protected by the mutex and we will operate on the log and hashtable together, it makes sense to put it into the Mutex. This makes it compile-time impossible to acquire the log without acquiring the mutex.
The get operation remains unchanged. put and delete now call the relevant methods on Log before making the change to themselves.
We'll use Rust's rich enums to represent log operations. I realized that this was overkill while writing this post, but changesets are immutable, so I'll simplify the code later.

enum LogOperation {
    Put(Vec<u8>, Vec<u8>),
    Delete(Vec<u8>),
}

The Log operations delegate to the append method which actually writes bytes to the file. The log format is simple. Each list of bytes is prefixed with it's length as a 8-byte, big-endian number. We use a p for a put and d for delete. So a sample log would look like (each character represents 1 byte):

00000001p00000005hello00000006world!00000001d00000005hello

This allows fast sequential reading of the file. We will use the byteorder crate to perform the u64 conversion.

fn append(&mut self, op: LogOperation) -> io::Result<()> {
    let mut bytes = Vec::new();
    match op {
        LogOperation::Put(ref key, ref value) => {
            bytes.append(&mut encode_vec(&['p' as u8]));
            bytes.append(&mut encode_vec(key));
            bytes.append(&mut encode_vec(value));
        },
        LogOperation::Delete(ref key) => {
            bytes.append(&mut encode_vec(&['d' as u8]));
            bytes.append(&mut encode_vec(key));
        }
    }
    self.file.write_all(&bytes).and_then(|unused| self.file.sync_data())
}

We write out the bytes, then use sync_data() to force writes to disk on systems which support it. This gives us a key value store that can save data to disk. The problem is, a new run of the program doesn't load the data back from disk. We'll get to that in the next post.

Wednesday, July 29, 2015

Banner Peak

Note: Image titles can be viewed by hovering over the image.
My interest in Banner Peak and Mt. Ritter began when I encountered them while hiking the John Muir Trail in August 2014. Immortalized by Ansel Adams, the 2 mountains framed by Garnet Lake and Thousand Island Lake are well known and frequently climbed.

I snagged permits for Ediza Lake several months ago, with an intention to climb both Ritter and Banner via their scrambling routes from the Ritter/Banner saddle.
The hardest problem in High Sierra climbing is balancing a technology job in Silicon Valley at the same time. Getting to the eastern Sierra takes forever from the Bay Area. I hate to drive that distance twice over a weekend and it prevents deeper exploration of backcountry peaks. Fortunately, things had worked out so that Banner Peak was the first in a series of adventures as I drove up along the west coast from the Bay to Whistler, BC. I left the Bay Area on Friday night and drove into Hodgdon Meadows campground at midnight. The rest of the crew was already there. After a decent sleep under pines, we packed up and drove to the Mammoth Lakes Visitor Center to pick up the permit. It was a ridiculously hot day and it seemed like the uphill wasn't going to be fun. On the other hand, I was carrying new glacier glasses and was excited to try them on!
The Mammoth Ski Area and Devil's Postpile were very crowded and we had to wait for 2 shuttles before we could get on. With several pointy things on our packs, people gave us a wide berth. Taking the shuttle brought back not so fond memories of the JMT, when we had emerged out of Ansel Adams wilderness after a 17-mile day followed by a boring 14-mile day. Fortunately the River Trail is much nicer than the JMT as it winds its way up the Middle Fork San Joaquin.
After all these shenanigans to get to the trailhead, we started hiking at 12:54pm. The hot weather had led to typical Sierra afternoon clouds and there was occasional thunder as we began the hike. Fortunately the winds were carrying the clouds away from us. After about 2 miles the trail heads west to follow Shadow Creek and begins the 700ft ascent to the lake outlet. Shadow Creek was in full flow, creating remarkable waterfalls down quality granite.


Although Banner and Ritter require crampons and ice axe, they are not very technical. The best footwear is mid-weight hikers which are solid enough to accept strap-on crampons. Unfortunately I don't have something like that, so I wore trail runners and paid the penalty of carrying 3 season mountaineering boots. Still, I'd have hated to do the 8mi approach in mountaineering boots in such hot weather and I paid the price willingly.
We stopped for lunch near the Shadow Lake inlet and enjoyed Jamie's summer sausage. Earl was having some trouble keeping up and the mosquitoes got to work on us until he caught up. Here I made a mistake and started heading south on the JMT, fortunately realizing within a few hundred feet when the trail started downhill. After following the JMT for a short stretch, with the picture of the missing hiker still present at the post, we branched off to the Ediza Lake trail. This is great hiking with several cascades and tree cover cooling things down. Views of the Ritter range peek through under brilliant blue skies. Yellow glacier glasses also tend to pop blues, making it even nicer!


We reached Ediza Lake around 4pm and debated if we should cross the shorter talus or the longer trail. The trail won and we made it to the west side quickly. There were already several tents pitched here. At this point we still had several hours of daylight and most of us were feeling good. We decided to put in another 2miles and 1000ft of effort to go higher up the valley leading to Ritter and Banner. This allowed us to
1) Be above the treeline with nicer views and more solitude. 2) Get a good idea of conditions on the route. 3) Not have to deal with finding the way up the valley in the dark the next morning. 4) Shave some elevation off the next day which was going to be much longer.
Our efforts were rewarded with an incredible waterfall!


Over all, I highly recommend the higher elevation campsite. No mosquitoes, solitude and great views. Around 10200 feet there are some reasonably flat spots about 200feet east of the small creek. This is right next to a series of big, flat boulders that shape the creek. After a ramen and scrambled eggs and bacon dinner, we prepped the packs for the next day and spent some time enjoying the absolutely stunning scenery. A huge cell had developed further down the valley and the setting sun was throwing up every shade of orange on it. I also spent some time walking Jamie through ice-axe and crampon fundamentals, since she was the only one in the group with no prior experience. Ed had decided not to attempt the summit so he wouldn't make his knee any worse.


The next day we started moving at 5:10am. Already the weather was very mellow. In fact it hadn't even reached freezing at night. Within a quarter mile it was time to put on crampons to deal with the hard snowfields lower down the valley. Arun found out that his rental crampons were not going to fit his shoes and had to bow out too. Earl would turn back after some time as he was having trouble keeping up again.


Conditions were good and the rest of us - Dawn, Jamie, Michal and I - made good progress to the true snowfield. There was some snow melting already and slush was starting to show up in places. As you gain the snowfield you are treated to the first views of remote Iceberg Lake. The Minarets Loop has long been on my list and I should get to it soon. I'd like to reach a fitness level that would let me do it in 2 days while still enjoying it before I attempt it.
The wind picks up as soon as you are on the snowfield and once you enter Banner's shadow, things get really chilly. The couloir leading up to the the saddle is intimidating, but can't be more than 50 degrees at the steepest. Stay to the right so avoid occasional rockfall. We gained the saddle some time after 7. There was still plenty of snow on Ritter's North face and the saddle. The glacier on the west led directly to frozen Lake Catherine. There was no one in the mountains yet except us.


We left our crampons at the saddle and started up the talus slog that is Banner's west face. It is unstable, tricky, and this early in the season had dangerously icy blocks as we went higher up. There were cairns marking the way occasionally, but we'd often have to take detours to avoid the ice. Fortunately the route finding is straightforward. Stay low and head towards the west ridge. It is important though to not actually get to the ridge. With some occasional class 3 climbing we were able to get close to the summit fairly quickly, but then had a decision to make. Should we get to the west ridge or was there a direct way to the summit?
I decided to head for the ridge and that culminated in two truly scary moments. One was mantling onto a icy rock with a fair amount of exposure. That allowed me to gain the ridge, but as I found out, that was too far. Although you can ride the ridge to get near the summit (close enough that you can hear and see your team which has stumbled upon the correct path while you've been trying to kill yourself!), there is a gendarme that blocks the way and I had to do another bit of tricky traversing (grumble, mountaineering boots, grumble) to get back on route. After an unnerving few minutes, I was finally on the summit at 9:15am.
The views from Banner Peak are astounding. Remote landscapes across the Sierra and Mono county merge with familiar landmarks. Thousand Island and Garnet Lakes are just a steep drop away, Donohue pass is up north, Mono Lake twinkles farther out and Iceberg Lake stands alone among the Minarets. To the west, Ansel Adams wilderness stretches out. Down south the peaks of the High Sierra go on forever and while I'm no great peak identifier yet, just knowing that Mt. Brewer and Whitney and others were out there adds a sense of grandeur to the adventure.


The elephant in the room is of course Mt. Ritter. It was painfull obvious that we wouldn't be able to climb it. Going up Banner had been slow and descending would be even slower due to the unstable rock. Facing over 13mi of hiking from the summit to the car, the prospect of hiking up another 1000ft of unstable rock was unappealing even if we had had the time.
After signing the register Michal headed down while the rest of us enjoyed the summit a little longer.
The way down was uneventful except for the occasional pile of rocks someone would send tumbling down. If you are experienced enough in the Sierra to attempt Banner, you should already be aware of spacing people out and staying out of fall lines. Don't forget a helmet! Back at the saddle we noticed a trio halfway up Ritter. An enterprising lone skier made it to the saddle from Lake Catherine and skied down. We put the crampons back on and downclimbed the couloir. This was not fun at all. The snow was sticky and unstable and the going was slow. Slush and dangerous potholing on the lower snowfield was followed by a talus descent until we finally arrived back to camp around 12:30.
Ed and Ankur had hiked on ahead so they could take it slow, while Earl was waiting for us and left as we arrived. Everyone was exhausted, but there was enough adrenalin to keep things in motion and we packed up and started hiking out by 1pm.
The descent was brutal on the knees and took forever. We took the talus side of Ediza Lake, crossed the outlet via a series of very delicate steps, and trundled quickly down the rest of the trail. I felt fairly empty inside, so imagine my surprise when a hiker going up remarked that I looked really fresh. The more adventures you do the more abuse your body seems to withstand, but the mind doesn't always calibrate itself correctly, especially when the weather is bad or the stomach is rumbling.

Tackling the 300 feet of uphill specially reserved for the very end of the trail we reached Agnew meadows after 11hr and 39min of being on the move for the most part. After a shuttle dance we got to the cars around 6pm.
After a quick dinner at Pita Pit, everyone else left to drive back to the Bay Area. I was heading to Reno, for the first of several nights not spent in my own bed. I stopped near Mono Lake to catch sunset, before driving the rest of the way along beautiful 395 (the second time within a month) and collapsed at the Nugget around 10:30.

Hiking stats according to Suunto Core (includes breaks)

Trip date: June 13-14, 2015
  • June 13 - start 12:54. Car to camp: 6hr 15min 36sec
  • Peak elevation: 3044m
  • Ascent: 617m, avg 6m/min
  • Descent: 115m 5m/min
  • June 14 - start 5:10. Camp to summit to car: 11hr 38min 58sec
  • Peak elevation: 3871m
  • Ascent: 954m avg 7m/min
  • Descent: 1457m 9m/min

Wednesday, February 11, 2015

Getting Vidyo running on Archlinux & Plasma 5

I recently upgraded to Plasma 5.2 based upon this glowing review. While the transition was smooth for the most part (apart from minor KWin issues), Vidyo started to segfault. The Plasma system tray no longer supports older system tray protocols. I'm not aware of the details, but VidyoDesktop would complain about not being able to set a system tray icon and segfault. The fix is to install the sni-qt package from the extra repository.

Sunday, July 27, 2014

ServiceWorkers in Firefox Update: July 26, 2014

(I will be on vacation July 27 to August 18 and unable to reply to any comments. Please see the end of the post for other ways to ask questions and raise issues.)
It’s been over 2 months since my last post, so here is an update. But first,
a link to a latest build (and this time it won’t expire!). For instructions on
enabling all the APIs, see the earlier post.

Download builds

Registration lifecycle

The patches related to ServiceWorker registration have landed in Nightly
builds! unregister() still doesn’t work in Nightly (but does in the build
above), since Bug 1011268 is waiting on review.
The state mechanism is not available. But the bug is easy to fix and
I encourage interested Gecko contributors (existing and new) to give it a shot.
Also, the ServiceWorker specification changed just a few days ago,
so Firefox still has the older API with everything on ServiceWorkerContainer.
This bug is another easy to fix bug.

Fetch

Ben Kelly has been hard at work implementing Headers and some of them have
landed in Nightly. Unfortunately that isn’t of much use right now since the
Request and Response objects are very primitive and do not handle Headers.
We do have a spec updated Fetch API, with
Request, Response and fetch() primitives. What works and what doesn’t?
  1. Request and Response objects are available and the fetch event will hand
    your ServiceWorker a Request, and you can return it a Response and this will
    work! Only the Response(“string body”) form is implemented. You can of
    course create an instance and set the status, but that’s about it.
  2. fetch() does not work on ServiceWorkers! In documents, only the fetch(URL)
    form works.
  3. One of our interns, Catalin Badea has taken over implementing Fetch while
    I’m on vacation, so I’m hoping to publish a more functional API once I’m
    back.

postMessage()/getServiced()

Catalin has done a great job of implementing these, and they are waiting for
review
. Unfortunately I was unable to integrate his patches into the
build above, but he can probably post an updated build himself.

Push

Another of our interns, Tyler Smith, has implemented the new Push
API
! This is available for use on navigator.pushRegistrationManager
and your ServiceWorker will receive the Push notification.

Cache/FetchStore

Nothing available yet.

Persistence

Currently neither ServiceWorker registrations, nor scripts are persisted or available offline. Andrea Marchesini is working on the former, and will be back from vacation next week to finish it off. Offline script caching is currently unassigned. It is fairly hairy, but we think we know how to do it. Progress on this should happen within the next few weeks.

Documentation

Chris Mills has started working on MDN pages about ServiceWorkers.

Contributing to ServiceWorkers

As you can see, while Firefox is not in a situation yet to implement
full-circle offline apps, we are making progress. There are several employees
and two superb interns working on this. We are always looking for more
contributors. Here are various things you can do:
The ServiceWorker specification is meant to solve your needs. Yes, it
is hard to figure out what can be improved without actually trying it out, but
I really encourage you to step in there, ask questions and file
issues
to improve the specification before it becomes immortal.
Improve Service Worker documentation on MDN. The ServiceWorker spec introduces
several new concepts and APIs, and the better documented we have them, the
faster web developers can use them. Start
here
.
There are several Gecko implementation bugs, here ordered in approximately
increasing difficulty:
  • 1040924 - Fix and re-enable the serviceworker tests on non-Windows.
  • 1043711 - Ensure ServiceWorkerManager::Register() can always
    extract a host from the URL.
  • 1041335 - Add mozilla::services Getter for
    nsIServiceWorkerManager.
  • 982728 - Implement ServiceWorkerGlobalScope update() and
    unregister().
  • 1041340 - ServiceWorkers: Implement [[HandleDocumentUnload]].
  • 1043004 - Update ServiceWorkerContainer API to spec.
  • 931243 - Sync XMLHttpRequest should be disabled on ServiceWorkers.
  • 1003991 - Disable https:// only load for ServiceWorkers when Developer Tools are open.
  • Full list
Don’t hesistate to ask for help on the #content channel on irc.mozilla.org.

Friday, May 16, 2014

ServiceWorker implementation status in Firefox


ServiceWorkers are a new web platform feature that allows sites to use JavaScript to provide a better offline experience, and eventually various other 'background service' capabilities. Jake Archibald has a good article on his blog explaining them further.

I've been working on the Gecko implementation for a while now, helped by several other Mozillians and some of the first patches are now beginning to land on Nightly. Interest in trying out a build has been high within both Mozilla and outside. I've been procrastinating about a detailed hacks article, but I thought I'd at least share the build and what Firefox supports for now and what it doesn't.

  1. Download the build
  2. Run it using a clean profile.
  3. Go to about:config and set "dom.serviceWorkers.enabled" to true.


Supported:
  • Registration, installation, activation, unregistration. Update() is not according to the spec, the scripts themselves are not cached offline, so don't actually try to make offline apps yet.
  • Intercepting navigation and fetch events and replying using a simple SameOriginResponse object.
  • Intercepting Push API events.
Not supported:
  • Cache API
  • fetch() - You'll have to use XHR in the worker.
  • ClientLists and postMessage() to talk to windows
  • Persistence - ServiceWorker registrations are currently not stored across restarts.
  • Anything that throws an error :)
  • No devtools support right now.

SameOriginResponse is a relic of an earlier version of the spec. Similarly the Request object received from the fetch event is not exactly up to speed with the spec.

I have two sample applications on Github to try out the build. Note that ServiceWorkers require HTTPS connections. For development, please create a new boolean preference in about:config - "dom.serviceWorkers.testing.enabled" and set it to true. This will disable the HTTPS requirement.

Push API Test - Remember to run the Firefox build from the command line since this demo prints stuff to the terminal. Click the register button to sign up for Push notifications. To perform the push, copy the unique URL and run


curl -vX PUT 'URL'

The ServiceWorker will be spun up and a 'push' notification delivered.

Simple Network Interception - This example will load an iframe with some content. Refresh the page and the iframe's content should change and the browser should show an alert dialog. These changes are done by the ServiceWorkers (there are 2, one for the current scope and one for the sub/ scope) intercepting the requests for both "fakescript.js" and the iframe and injecting their own responses.

Contributing

We could always use help with the specification, implementation and testing.

The specification is improved by filing issues.

The tracking bug for the Gecko implementation is Bug 903441. There is a mercurial patch queue for patches that have not landed on trunk.

I (nsm) am around on the #content channel in irc.mozilla.org if you have questions.

Thursday, May 15, 2014

Trip Report: Canyonlands Backpacking and Packrafting

Lacking in pictures because even in 2014, embedding images from alternate sources in a blog post is ridiculous UX fail!

In March (19-25), Raj, Michaela, Roxana and I went on a 6 day trip to Utah. The itinerary was to fly into Salt Lake City, drive to Moab, do a 4 day backpacking and packrafting trip in Canyonlands NP, spend a day in Arches NP and head back. It was one of the best trips I’ve done and a splendid (and early!) start to this year’s trips.

The backpacking trip was based on one covered in Backpacker magazine but modified to fit our schedule and capabilities. We’d start from the Elephant Hill TH in the Needles District, hike down to the Colorado at Spanish Bottom and cross it by packraft. Then hike up to the Doll House, hike north to the Harvest Scene, head east to Water Canyon, then go off the established trail to follow Water Canyon to the Green River. From there we’d raft down to Spanish Bottom and hike out. It was some 36 miles of hiking and 8 miles rafting over 4 days.

We used Alpacka rafts rented from Packraft Rentals at $150 for the raft, paddles and PFDs.

Having visited Moab before, Michaela was our “guide”. The Moab Brewery for dinner was a very good recommendation! With the final civilized meal consumed, we drove 2 more hours to the Canyonlands Needles district. All the walk-in campsites in the park were taken (2 people actually refused to share a campsite with us, which was very rude considering how much space there was per site!), so we drove back 20 minutes to the privately run campsite called Needles Outpost ($20/night).

It turned out to be a very cold night, making it hard to leave the sleeping bag. The reward for getting out was the incredible views of canyon country, the first time we saw it after driving in in the dark. The Needles Outpost itself is in a fairly large plateau so that you can look far away to the Needles rising beautifully in the west, while also seeing the pinnacles of Indian Creek and more distant areas in the east. While I missed sunrise, reds, browns and yellows were still shimmering and changing in the early morning Sun.

At the ranger station we found out that the established campsites throughout the park are only for car campers, and backpackers have to practice dispersed camping. While not a deal breaker, it was surprising, since the website doesn’t mention this. We also spoke to the ranger at Hans Flat over the telephone who told us that there were no reliable sources of water except the Colorado and a few springs near the Harvest Scene, so we tanked up with 4 liters each.

NOTE: WAG bags are a good idea in Canyonlands since the climate is too dry for waste to decompose quickly. Please use them! They are required by law when camping near rivers.

We eventually set out at 11 from the car. Boy were the packs heavy with several days of food, 4 liters of water and 4kg of raft! The journey from the Elephant Hill TH to the river is relatively uneventful, though very beautiful. The trail follows the 4 wheel drive road to Devil’s Lane, where it goes westward into the sheer wall ahead. Go into the clump of trees to climb onto the wall and follow it to get on the trail for Cyclone Canyon and Lower Red Lake.
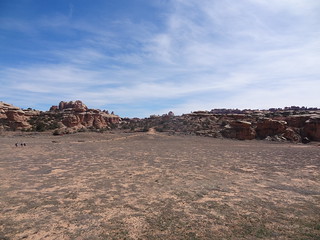
The last 1.5 miles of the Needles hike are very different from the beginning. The canyons become taller and narrower, and the rock is now a dark red. Here it seems like the original trail has been closed due to rockfall, because the National Geographic map is not congruent with the new trail which climbs along the southern canyon walls before beginning a steep descent into Lens Canyon. Then it’s a mile of walking on sand, making your own path along the dry river bed to Spanish Bottom. We reached the bottom around 5pm. The Needles side of Spanish Bottom is a expansive beach and while everyone wanted to relax I refused to let them do so. The N-S orientation of the river at this point and the 1400ft high cliff walls on the western side means that sunset comes early. So at 5:30 we began inflating our rafts. While doing so, a group of real motorized rafts went down the Colorado as a guided rafting trip. Raj’s raft had developed a puncture and needed a second inflation after patching it up. Frankly, it was too much work to get across 30-40m of calm water. My thoughts about the rafts were to improve only a little over the next few days.
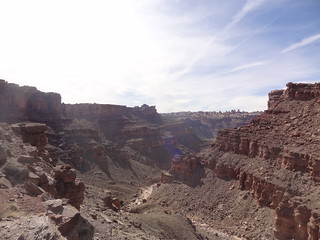
DSC00297

I should point out one constant nagging feeling I had the whole trip. This whole place is made for climbing. Everywhere, the sandstone has straight cracks running through it, towers that rise above the canyons and even the occasional boulder at a canyon bottom is very inviting. It is isolated though, and I’d imagine lugging equipment and supplies would be as bad as hauling our rafts. No wonder climbers stick to Indian Creek.

Slightly downstream, where the Colorado begins to turn east, there are noticeable steps on the western bank and an obvious campsite. The steps are also in an area of exceptionally still water so there isn’t any fear of being swept downstream while trying to land. The 30ft length of cord I’d brought along proved immensely useful this entire trip. Hooking it to a rock allowed me to clamber out of the raft without worrying about my boat and pack, and it was our anchor for the last night along the river. The Green and the Grand (now called the Colorado) carry tons of silt down their course and that and the sandy banks means that transitioning back to land is a muddy affair.

Once all 4 boats had been pulled in and no one had been lost to the river we setup camp. The rangers had advised us that Colorado water was far too silty to use filters, but with a Sawyer Mini and carrying the backflow syringe, I didn’t face any problems. Using the cord tied to a Smartwater bottle, and using my foot to hold the bottle down allowed retrieving water without falling into the river. Tomorrow would be a long day with no water again till the very end, and so I filled 7 liters to last through the night and day.

At this point Roxana couldn’t find her tent and we figured at best it was left behind in the car, and at worst lost, but that she’d be spending the next 3 nights without one. Which isn’t a bad deal at all when the weather is great. For tonight she’d be sleeping over her inflated packraft, her fancy solar powered lamp on a stake next to her.

Although we were tired and dirty, the twin annoyances of the desert - dryness and gritty sand in everything - had not yet begun to gnaw on us. We went to bed in high spirits.

Day 2: The first night in the wilderness was quite warm, with temperatures probably hovering around 5C. This was to be true all 3 nights and I can’t fathom why that first night at Needles Outpost had been so cold.

We woke up around 7 (the alarm was for 6, but I was tired and it was still dark outside!) and were ready to roll by 9:30. Packing the rafts had taken up at least 30 minutes of our time. Today seemed like it would be the day of most effort. We had to carry the rafts and plenty of water and most of our food up 1400ft and 2 miles followed by 3 miles on a very gentle uphill to Chimney Rock. As we started up the southwestern side of Spanish Bottom, we encountered a group of day hikers from the guided trip we’d seen last night. They had camped before the start of the Cataract Canyon rapids and were on a quick jaunt to the Doll House before (I guess) hitting the rapids. Compared to them, we looked like pack mules! The load on our backs was - our standard pack, the middle halves of the oars sticking out of the side pockets and the paddles in the outer pocket of the pack. The PFD was hooked onto the oars, and then the raft lashed to the bottom or top of the pack. With my relatively fragile pack, I also carried my water in the front in a daypack to avoid overloading it.

Nevertheless we completed the steepest of the ascent in a swift 45 minutes (considering our loads) and were at the Doll House within the hour. Here we could not find the restrooms we hoped for. Carrying waste around is nobody’s idea of fun, so I was disappointed at having to use my WAG bag a day before I would’ve hoped to. Other than that quibble, the Doll House is an incredible view of stacked boulders and cylindrical rock formations surrounding a huge meadow of prickly pear and other desert shrubs. If you look northeast from certain points you can see the distant La Sals, their snow covered peaks a stark contrast to the desert around us for miles in every direction. We encountered the 4WD road that heads northwest to Chimney Rock. Once it leaves the Doll House this road is singularly uninteresting within the immediate surroundings. Standing Rock on the west and Chimney Rock in the north beckon, but canyon country is farther to the east and each canyon is too small, yet the sheer number too big for the mind to really comprehend it.

The 4WD road diverges from Chimney Rock the way mountain trails do, before finally turning back to meet it just as you are starting to despair from the weight. Chimney Rock to me wasn’t very interesting. It was impressive that the spire had formed, but now it just sat there through dry millenia, acting as a waypoint in the confusing mass of canyons and mesas. There were several caches of water left here by other parties. We found a nice cave and stashed our rafts and associated implements there, then sat at the Chimney Rock Trailhead and had lunch. It was now around noon.

A full stomach and a lighter pack are a huge boost to morale and speed, and the fact that things literally went downhill from here really served us well. From Chimney Rock, 3 trails head out. One goes east to take the long way back to the Doll House, and two go north. Contrary to what the National Geographic map says, both trails do not start west of Chimney Rock. Rather, the westward trail is on the west of the rock and the eastward trail is on the east side. We followed the one on the west. Head a little further north and true canyon country immediately opens up. While the views had previously been dominated by red rock, here the tops of the canyons were all yellow while the sides were darker brown and it looked spectacular. The Chocolate Drops are quite obvious and Maze Overlook ascends behind them. The trail immediately goes around one small canyon and descends into the next. Descending the canyon is a very interesting experience. All the Canyonlands trails try to be as direct as possible, which meant we were either descending steep but smooth sandstone walls by the magic of rubber soles, or going down big ‘steps’ where our packs were a hindrance. Cairns mark the descent, but there are plenty of other rocks scattered around, so be careful! During the descent we crossed a few pools of water, but not expecting to find them, we had all the water we needed. Once at the bottom, there begins 3 miles of walking on the sandy river beds of long dry rivers. I have no idea whether these rivers are still active, but there at the bottom it sure didn’t seem like any substantial flow had occurred on any human timescale. About half way in, the trail joins up with the one coming from Lizard Rock. While we were sure that we were at the right canyon, we could not find the actual trail. Our destination of course was north, and that trail was easy to find. Following the meandering river is an exercise in patience, and it seems I wasn’t the only one growing irritable about that. The trail cuts through the banks at nearly every turn, and this compacted sand was almost a pleasure to walk on compared to the loose, deep sand in the river bed! Be careful though, as prickly pears and other spiky plants might stab your feet. Larger juniper and cottonwood trees lined this and several other river banks in this part of the park.

Continuing on, we were vexed when Harvest Scene didn’t show up where it was supposed to. The map was wrong again, Harvest Scene is not on the east of the trail but actually on the wall to the ‘left’ (northwest). I must say that I was expecting some sort of NPS sign or similar, but there was none, and the scene, while beautiful, is at eye level and small. I had had the notion that it would be something majestic, since everyone seemed to talk about it, and in that sense I was disappointed. The paintings themselves are incredible though, and almost alien in there depictions.

The ranger had said that camping was prohibited 1 mile around Maze Overlook, and that Harvest Scene would be a good place to camp (not near it obviously), but we wanted to press on to where the trail hits a wall and becomes northwest-southeast, the left side going to Maze Overlook and Horse Canyon, the right side going back towards Chimney Rock. There is a ‘Spring’ marked on the map here and confirmed by the ranger (Cynthia?) as flowing. We reached this intersection around 5pm. I come from the wetter areas of the world and my usual stomping grounds are the Sierras, so I thought a spring would be emerging from the rock and trickling as a little waterfall of clear water. Instead, the spring was just a muddy trickle, that was lost underground a few hundred feet east. Fortunately, heading a few hundred feet west, the water had collected in a small ditch. It is likely that in late spring this water will be stagnant and possibly smelly (unless it dries before that), but right now it was cool and clear and I was okay with drinking it.

This ditch was just to the west of the trail intersections where the next canyon on the west starts, seperated from the Harvest Scene trail canyon by a small spur. In this canyon, ascend just a few feet up the river bed (south) and a fairly clear path leads uphill (westward) to a rock platform. This platform is a great campsite. It’s neither high nor low, fairly close to water and on hard ground. The rock can sleep upto 3 people (don’t move the kitchen platform in the center! :)) and two more can fit on the soil in the clearing. There is a wall to the southwest, but there are great views of the southwest-northeast canyon and the effects of sunset and sunrise are gorgeous. In Beyond the Hundredth Meridian, Wallace Stagner quotes someone (too bad I can’t find it right now), about how distances play tricks in the Plateau Province, so that the air itself seems thicker and things seem more crisp, and I had to agree.

While in the morning, and even until I reached the Harvest Scene, I had been enthusiastic about a quick hike up to Maze Overlook, we were all exhausted by this point and I too chose to stick to camp chores. I swear I poured out a half a pound of sand from my shoes and socks! Meshy, low-cut trail runners and no gaithers are not good desert wear. I should try sandals next time.

Roxana and me shared the tent today as she did not have the raft and other items as insulation.

Day 3: We set off at 7:30 today. Today we would follow the eastern fork of the trail back to Chimney Rock. We continued for 2 miles down the canyon system we had been in since yesterday. Here the trail is easy to miss among the sandy bottom and for a while the cairns are far apart. It is better to use the more detailed Maze district map. The major landmarks are a few islands where the trail proceeds to their left. Eventually the trail steepens and involves some scrambling as it rises out of the canyon. There is one class 3 (easy, but exposed and tipsy when wearing a pack) move to gain a ledge, then head left to climb over a barrier. From here, bound up the cairned trail and you eventually emerge on a mesa that will lead south to Chimney Rock.

This part of the trail is easily the most enjoyable of the trip. Minimum elevation change and great slickrock make for easy walking, allowing you to enjoy the views of the canyons on both sides, the Chocolate Drops and the rest of Maze country spread out in the west and the La Sals gracing their presence in the east. It is possible to make really good time here and we were at Chimney Rock a little before noon.

Take a lazy break here, as the next part of the journey is equally inspiring and terrifying.

After lunch, we retrieved our caches, bringing the packs back to their “stupid heavy” weight and headed east on the trail that goes back to the Doll House. The trail descends into a slickrock canyon that is ridiculously fun to descend. Teetering masses of stone serve as stairs in certain parts, while other parts require some scrambling, but the footing is sound and the journey is quick. Our luck of cloudy mornings had held out today as well, but now the sun had broken through and it was hot at the bottom of the canyon. Continue to follow the well marked trail along the canyon. The Shot Canyon stream had pockets of water when we were there, and in a wet year may even be flowing. Here the trail again cuts through meadows rather than follow the meander and it is a good idea to keep an eye out for cairns. At this point my raft was making a big deal of trying to fall of my pack.

Eventually the trail will turn southeast (it has been heading northeast from Chimney Rock down Shot Canyon). This turn takes longer to arrive than it looks on the map, but again, the trail is well cairned and you should avoid worrying. Here you’ll climb up several hundred feet, only to descend back down the other side into Water Canyon. On the way down, the trail enters a narrow hanging canyon. When it exits in a couple of yards, it is to a sheer drop into Water Canyon. This is a beautiful spot to spend some time. Water Canyon is huge, and green, and your seat is in a coveted place. Once satisfied with the view, turn right to follow the ledge, which descends and takes a U-turn before descending to the canyon floor.

True to it’s name, Water Canyon has a fairly large stream and water is assured. At the bottom, leave the trail and head east, following the course of the stream. Although not appearing on any maps, there is an obvious trail down to the Green. Obvious does not mean easy though. About 1.5 miles before the intersection with the Green the stream careens off the cliff.

Here the trail goes right and takes an adventurous path down over extremely rotten rock. This sketchy trail should be approached with extreme caution. There are several places where it narrows to have only enough place for one foot. Gravel and sand abound to make footing unsure. Talus fields make up whatever is left. Remember to avoid hiking below someone’s fall line as it is very easy to kick of rockfall. The only consolation is that cairns mark the way.

Set aside at least an hour for this half mile, 500 ft descent to the canyon floor. Almost at the bottom of this adventure, the stream collects into a very inviting pool. Unfortunately, short on time and having no beta of what lay ahead, I forced the others to abandon this luxury, but you may want to make use of it.

Once at the bottom, follow the stream until it starts flowing over solid slickrock and the course of the Green is visible. About half a mile from the intersection the stream will enter another pool. Here the route is confusing. One way would be to enter this waist deep pool and wade through it, but you do not know what the other side holds, and at least in March the water is cold. But head up and look to left and you will see a cairn marking a trail following the cliff.

A use trail also goes to the right (south) of the stream. DO NOT take this. We did and ended up at a dead end near the Green resulting in a significant detour to get back on track. After reaching this dead end I realistically considered descending the cliff at a very prominent ledge system, but was shot down by the others :)

The trail on the north side is fairly straightforward, although it can be daunting at the end of an exhausting day. Soon you will reach the Green River. Such a large body of water, flowing calmly through huge canyons was a wondrous sight after 2 days in the dry desert. This is famous Stillwater Canyon, ahead of which lie the rapids of Cataract Canyon. The trail does not immediately descend to the river bank; Tamarisk trees have completely taken over this delta and made the approach impassable. Instead, the trail goes north along the Green for a few hundred feet and then descends to a sandy shore. Do not take the first faint turn. The actual trail has a small area that would make a good campsite right by the river.

We had originally hoped to reach Spanish Bottom today, finishing all 8 miles of the river journey. The unexpected slow descent followed by going on the wrong trail put us really behind schedule though and it was 6:30pm by the time we hit the water. So our aim was to keep going while there was enough light and find a campsite in one of many small canyons along the Green.

Not having a rain jacket, and not wanting to use my down jacket on a river, meant that I was wearing only two thin layers. The wind was blowing and the river was cold, so that I was quickly shivering.

This was my first major bit of rafting, since on day 1 we had simply crossed the Colorado laterally. While I appreciate the stability of a raft, it’s thin bottom is not very insulating, and it really lacks the fun manuevarability of a kayak. The large bottom also means that whether stuck on a sandbar or when launching off, it is pretty much impossible to shimmy to get the thing to move. Strapping the pack horizontally (perpendicular to the raft and on top of the (gunwales?)) is a better position as it allows your legs to be placed inside the raft. I didn’t do this on day 3 and got uncomfortable quickly.

Having a closed cell foam pad is great since you can sit on it and further increase insulation from the water.

Stillwater Canyon is easy to go through and you can easily spin around and take in the surroundings as you let the river carry you at 1-2mph. Just make sure to do some sandbar spotting before as there are several of these on the stretch to Spanish Bottom.

One time something that was possibly an otter swam by us, and we saw a few ducks, but otherwise it seemed like the 4 of us were the only living things on the river. We did paddle frequently since we wanted to cover more distance, finishing about 4 miles that day in 1hr 15min. Here (see map), a sandy beach large enough for several packrafts allows you to pull in. A well defined trail leads up this to a ledge that is probably not meant for as many people as the rafts. This ledge is wide enough for 2 people at the entrance, but narrows to a space comfortable for 1 person and their stuff the rest of the way. Pitching a tent is not a good idea since it just takes up too much space (Michaela and Raj insisted). The wind was low and it wasn’t so cold once we were out of the water, so I was happy to cowboy camp. The ledge does continue around to face the Green, and while an excellent spot to sit down, I would not trust myself to not roll of into the Green. More intrepid sleepers will find that it is easy to fit 7-8 people here, based on how cosy or daring they are.

Other than the ledge, the rest of the small canyon has trees and a meadow. There was no real place to hang the food, so that I just slept with it that night. I didn’t expect any larger animals to come down into this canyon that must see human habitation only infrequently. Rats I’d just have to live with. (They ate Roxana’s food and left turds in her pot, mine seemed to be untouched).

Day 4: Day 4 was an early start again. I have to commend the group on managing to stick to our departures regularly, the small number of people definitely helped. With the orientation, direct sunlight was going to be hard to come by for a while, so that the campsite was quite cold at first light. The advantage of sleeping with my food was that I could stay in my bag, eat, change and pack while staying warm. Only once I was ready to go did I get out of it :)

We had tied all the rafts together and looped the rope around a rock - just in case - and so they were all there waiting for us. We pushed off around 8am and soon reached the confluence, where Green and Colorado meet to form a river that will cross nearly half the continent before draining into the Gulf of California. It is a surprisingly calm confluence, and the rising Sun definitely raised our spirits after 3 days in less than ideal conditions.

Along the entire route of Stillwater Canyon red and yellow walls rise majestically, as if trying to make up for the indifference of the desert by the rugged beauty. Unless you are as dumb as a brick, Spanish Bottom is easy to identify due to the large beach and familiar surroundings from 3 days ago, but just in case, there is a sign board on the eastern bank a mile or so before it, warning that the Cataract Canyon rapids are coming up and packrafters with no prior experience better get out at the big beach up ahead. We pulled ashore a little before 10 and spent 90 minutes resting, waiting for the rafts to dry a bit, cleaning them up and filling up our water.

The final part of the journey reverses the first day’s route and I will not go into the details. It is an arduous climb in the beginning, and with the excitement of the upcoming trip gone, so does all energy and optimism. Just slog through it.

Just before the trail intersects Devil’s Lane Raj seriously thought we were lost since it was taking forever, and I was starting to have my doubts too, inspite of a correct compass bearing and vaguely familiar terrain.

We were very happy then to come across a family of day hikers. To see other humans after 2 days, ones that were clean and happy, really put a spring in our step. They also assured us we were on the right track and indeed we quickly emerged into the wide canyon.

We encountered a group of 3 teenagers who were heading to Spanish Bottom and they didn’t have a map! I hope they made it through fine.

The table at Devil’s Kitchen was a welcome place to sit on, but after eating through all our remaining food (those sausages were delicious!) we all returned to the ground, the primal living of the last few days still dominating our civilized selves!

From Devil’s Kitchen, which we reached around 2:30 and left at 3:30, it took us another 2.5 hours to finish the last 3.5 miles of 4WD track. We encountered two Texan 4WDs and their drivers on the way, who must have surely thought we were idiots to be walking.

As much as the Needles district is stunning, towards the end of the trip I was a mission to finish it and ignore everything around me that isn’t helping in that task. I maintained an unnaturally fast pace to reach civilization as soon as I can. It is funny how easy it is to ignore the calls of civilization out in the wilderness, but once you know it’s near, how hard it is to keep away.

I reached the Elephant Hill TH at 6pm and we spent another 45 minutes while everyone arrived and cleaned up. Then the long drive to Moab began with a quick stop at Newspaper Rock and occasional gawking at the climbers still on the cracks at Indian Creek.

“Thanksgiving Dinner” at the Moab Grill was heaven, even though CNN just wouldn’t give up on MH370(?) in the background. We then headed next door to the Big Horn Lodge and washed away the grime and sand. Hot showers are the second best thing invented after restaurants!

Arches:

Breakfast with green chile at the Moab Diner was great. We were still ravenous and went through a skillet each. This hunger was to haunt us the whole day, supplemented by pita chips, chocolates, yogurt, strawberries, big honking sandwiches and sugary candy that we munched on pretty much the whole time. After washing and shipping the rafts we grabbed the food at CityMarket and drove to Arches. We explored Arches like normal people do, avoiding getting out of the car, driving to observation points, rolling down the window and taking pictures. We still managed to get out 3 times, once to view Delicate Arch from the upper viewpoint, once to get to Sand Dune Arch (beautiful and easy scrambled to the top) and Broken Arch, and once to reach Double Arches (again some fun scrambling). We had lunch (the BHS) at a nice picnic spot near Broken Arch. After some wandering through the souvenir store, we began the long drive to Salt Lake City around 4pm. We didn’t make the most of Arches, but I think I’ll be coming back to Moab. That place is really happening!

A huge Chinese takeout dinner finally assuaged my hunger pangs and we slept for a few hours before catching the early flights to familiar, relatively humid, California.

Gear thoughts

This year, I’ve acquired some new gear in to cut down weight for several upcoming trips. Below are thoughts on the gear that I used for the first time on this trip.

MLD Cricket tarp - I’ve had the MLD Cricket for a while, but this was the first extended trip I’ve taken it on. I can’t comment on weather protection since the weather was calm the whole time, but it’s ease of pitching is great! I usually keep the center pole at 135cm and the door pole at 110cm. This is a good height to be able to enter without touching my knees to the ground. It is also surprisingly warm for being open on one side. One day it even acted as a comfortable 2 person tent. In this configuration, the center pole has to be put up vertical and not at an angle. The second person does end up being a little outside the tarp coverage, so it wouldn’t suffice in case of rain. I think if you were comfortable getting really cosy, then the 2 poles could be arranged in a V-configuration with space to squeeze in between.

The groundsheet i use with it also proved very durable for it’s weight and thickness (or lack of it).

Zpacks Arc Blast - This was my first time with my new, orange pack. It is the 60L variant with 1 hip belt pocket, hiking pole carriers, ice axe loops and bungee cord over the mesh. I was very impressed with it’s durability and load carrying capacity.

In spite of several scrambles on slickrock, it didn’t suffer any ruptures. There is a small hole near the top where I think something from the rafting gear may have pricked it, but it’s small enough to not bother even taping. It is mightly stained though. The material is nowhere as tough as standard packs, so I did ensure that on really bad descents I would take the pack off and lower it.

Most impressive was that it didn’t completely collapse from carrying 40lbs when it’s only rated to 30. I kept the frame straight to not load it. I have a feeling the stitching at the top of the shoulder straps was stressed, but it held up and I’ve had no problem in subsequent trips. I did not suffer any undue shoulder pain or hotspots, and the wide shoulder and hip belts really helped.

The 1L side pocket is very useful since it is bigger than most backpack hip pockets. I could fit the day’s snacks, knife, compass, headlamp and camera in there. I might get another pocket though to keep things seperated a little and avoid having one hip so heavy :)

The rolltop is secure and easy to use and allows great control over pack volume, so that it can become as small as the stuff you are actually carrying.

Zpacks 10F quilt - I replaced all the big 3 for this season since I’ve a major trip later this year and each of them has performed wonderfully on this trip. My 10F quilt is the 6’, regular size with 900fp down.

I am a side sleeper and I turn a lot, so I never bothered getting the zipper below me. On the first day when it went below freezing, that part did let in some cold since it’s not insulated. but I simply compromised by snuggling deeper into the bag and cinching it around my head. This immediately made it comfortable.

On the other 3 nights, I didn’t once have to zip it up completely. In fact using the Ghost Whisperer down jacket for the torso and the bag for the legs was enough. My legs remained warmed all the nights, even with just using my empty backpack as ground insulation. (I was carrying the torso length part of the Z-lite sol to save on weight and volume.)

Sawyer Mini - Performed splendidly. The backflush syringe took care of Colorado silt. What I love about the Mini is not having to filter all water at the source. I carried a 2L camelbak as the clean reservoir, and a 2L Platypus as the dirty reservoir and squeeze bottle. This allowed me to carry 4L but only expend effort into filtering the dirty 2L when required. The ability to fill the camelbak without taking it out of the pack is a big winner as is drinking straight from the dirty bottle with the inline attachment.

One design decision that was disappointing is that the washer on the dirty end is easy to lose while shaking the filter out. Mine flew into the trees on Day 3. Since this renders the filter ineffective, I’d expect it to be affixed much more tightly. I was also disappointed that Sawyer did not get back to me about what size of washer to use to replace it, despite several social media posts and and email. Eventually, I got one from Lowe’s that required some scissor work, and was a tight squeeze, but at least it won’t be flying off ever again.

I also carried a Smartwater bottle to add some more capacity in the desert and allow easily filling the Platypus.

This is my one and only experience with Packrafts, so I can’t comment on them, but I really wish manufacturers find a way to reduce the packed volume. We had to spend several minutes and lots of energy trying to get them small and even then they wouldn’t fit in the backpack with the other stuff, leading to a unstable carry on the outside. Also maybe a teflon coating so the sand would just slide off later? :)

Wednesday, May 15, 2013

Your Jabber ID as your Persona identity

(This is NOT an official Mozilla project and does not in any way reflect the views of my employer.)

Mozilla Persona is a way for users to use their e-mail ID as their identity on the web. While cool, it will only really take off when existing services that people use become Identity Providers. XMPP (Jabber) is a widely deployed IM protocol whose IDs look like e-mail and it is a secure, federated system in alignment with Persona’s goals. I thought it would be really cool if I could log in to Persona enabled sites using Jabber IDs. I’d like to announce browserid-xmpp which does just that.

It should work with any XMPP server that supports components and BOSH. That said I have only tested it on my VPS (with Prosody, ejabberd and Openfire), so any issues and pull requests are welcome, as is a quick comment if you deploy it on your server. You’ll also need a relatively sophisticated web server like Apache or nginx to serve the browserid file with the right Content-Type. CheckMyIdP is a great way to check if everything is setup properly.

browserid-xmpp is two things. The first is a XMPP component that can plug into any XMPP server and answer a certificate signing query. This is a fork of the “official” browserid-certifier with an Jabber-RPC front-end rather than a web service.

The second is the set of provisioning and sign in pages that can be re-used by any domain. The authentication is handled as a two stage process using BOSH. This was my first experience with BOSH and it is ridiculously cool how it works and supports session hand-off to another page, without which this would not be possible. On the sign in page, an XMPP stream is established and authentication is done using standard XMPP authentication. The established BOSH stream has a session ID and every message sent has an incrementing request ID. On successful sign in, the sign in page sticks these two, along with the JID into sessionStorage. The provisioning page reads these out and ‘attaches’ to the existing BOSH stream. Due to the unpredictable nature of the SID and RID, there is a reasonable guarantee that someone who attached to the stream successfully knew about the stream before. The provisioning page then makes a Jabber-RPC call over the same stream to the XMPP component. This call is performed on behalf of the JID and a certificate is sent back to the browser. You are now signed in!

P.S. I’d like to thank Cory Benfield for an excellent guide to writing an IdP.

P.P.S. This post was published right before a 12-hour plane ride, so I’ll be back for tech support in a while.

Friday, April 26, 2013

Push notifications for the Open Web

I’m excited to announce a new WebAPI that Mozilla has been working on for the past few months – Push Notifications for Web applications. Push Notifications let web applications be notified that something has changed on the server and that the application should refresh its data. For example, a calendar application can use Push Notifications such that whenever a new event is added on the server, the calendar application gets started in the background. The calendar app would then add the event to its local agenda and shut down, all without the user’s intervention. When the (pleasantly surprised) user looks at his phone, it has a current copy of his agenda.
Thanks to Push Notifications, Web applications are freed from repeatedly polling for updates, leading to a better experience for everybody. Users get better battery life and more responsive applications. Developers don’t have to re-implement polling logic in every application they write. Mobile devices benefit from intelligent scheduling of notifications to reduce network usage and further improve battery life.
There were several challenges involved in making a push notification system for the open Web:
  1. Developers shouldn’t have to pre-register their applications with a push notification provider. Native app ecosystems require this; for example, you have to get a token from Google to use Cloud Messaging for Android. But for Web apps, which can be self-hosted instead of being distributed by an app store, such restrictions would only limit the audience. In addition, anybody should be free to run their own push server for their devices. Mozilla can run a server for Firefox users. Carriers can run their own servers, on which they can use cellular infrastructure to wake up Firefox OS devices. In fact, an individual user can even run their own push server if they choose.
  2. Users shouldn’t have to log in to a third party to use push capabilities. Note: Users may still need to log in to the app so the app knows what information to push to the device. For example an email app isn’t very useful without logging in.
  3. Protect the user’s privacy. This means that the push server should not receive any private or user-identifying information that is specific to the application. In keeping with this, the push server does not receive any application-specific data. It can only act as a “shoulder tap” or carry a number specifying a “version” or similar identifier.
  4. Make Push Notifications an application wakeup API and not a “user notification” API. The act of displaying a badge or popup notification is not covered by Push Notifications. This decoupling means that applications can use push for all types of tasks, from dealing with IM updates to syncing information across devices without interrupting the user. Applications that do need to notify the user can do so by using the Notifications API with Push.
We believe we now have a system that can satisfy the goals while still being secure and scalable.

How do I make my Web application push enabled?

It is very simple for web applications to use Push Notifications. In fact, in only about 100 lines of code, I modified Gaia to support “Push To Install”. Once you’ve logged in using Persona on your phone, you can install an application to your phone from any browser on any device, just by pushing it to the phone.
The basic flow for Web application developers is:
  1. Your application calls navigator.push.register() to acquire a unique URL, called a push endpoint. This endpoint usually refers to a push server. Your app can call register() multiple times for different uses. For example, an email application could have one push endpoint for every account it tracks.
  2. Your application uses something like XMLHttpRequest to notify your application server of this push endpoint. The application server is maintained by the application developer. For example, if you write a microblogging application, you will have a server where posts are aggregated. You would then associate the push endpoint with the particular user of your application.
  3. When your application server believes something interesting has happened that your application should be notified about, it makes an HTTP PUT request to the push endpoint.
  4. The push server and the user agent (Web browser/Web runtime/Firefox OS device) communicate and deliver a notification to your application. If your application is not running, it will be started in the background and receive the notification. The notification is delivered using System Messages.
  5. When it receives a notification, your application should connect to the application server and download the newest data. Since Push Notifications is a signaling system, it does not carry data in the notification.
I’ll do a blog post with a detailed Push Notifications tutorial soon.

Status

On March 28, 2013 the first pieces of code to enable Push Notifications landed on mozilla-central and are enabled for Firefox OS builds. Set the pref services.push.serverURL to wss://www.simple-push.com:9999 and the APIs should be available. You can also run your own server.
The protocol is unlikely to change, but client bugs are still being fixed. As such, this is an experimental API. Push Notifications also obsoletes the older Push Notifications API.
Push Notifications is only available to Web applications at this point. There is agreement that web pages loaded in tabs should also be able to use the API, but various technical issues need to be resolved before this can work properly. This is the next major issue the team will address.

Thursday, November 15, 2012

A new adventure

(This is a long overdue post).

I remember when I used to have homework, then for a few years in college I had no work. Last month, after a 4 month vacation, I began ‘grown-up life’. Unlike other giant leaps, mine didn’t start with a small step. It started with a 13000km trip to Silicon Valley.

I am very happy to have started a new (and first!) job at Mozilla. After last year’s incredible internship, it feels just like home. I have joined the Platform team and begun working on some upcoming APIs which I’ll blog about as they shape up. Being able to work with extremely talented people and to work on a class of problems that very few engineers in the world get to toy with is very satisfying. It does come with its share of problems, like having to get to grips with a decade old, sparsely documented code-base, but damn, when that code executes correctly after hundreds of iterations, there are so many snacks to celebrate with :) But seriously, joining Mozilla at a time when Web architecture and APIs are undergoing massive upgrades, and we get ready to launch a mobile operating system, is very exciting. Oh and employees get to be guinea pigs test it.

Couple this with managing your whole life for the first time. No longer do parents or the dorm automatically pay electricity bills or ensure your Internet connection is working. House hunting, paying rents, moving, buying furniture, managing finances, cooking, everything has been a first. Smooth for the most part, but far too salty sometimes.

Couple this with the constant technical, cultural and recreational melange that is the Bay Area and the regret about not having enough hours in the day and it’s overwhelming. In a month I’ve discovered rock climbing, seen a trapeze act, won second prize in a hackathon and gone to various meetups. Every day when I snuggle into my comforter-sleeping bag combo (you see, I still haven’t bought a mattress) get into bed, I’m exhausted, but every day is also a very satisfying adventure. I can’t wait to have more of them.

P. S. The libuv book has suffered due to this, but I’ll get back to it soon.

Friday, November 09, 2012

A poor man's Notational Velocity on Linux

I use Notational Velocity on my Mac all the time. It holds all my notes, lists and any other snippet of text. I love the interface and simplicity, and most of all I love the simple use of text files in Dropbox as a store. This way I can access my notes anywhere, without needing NV to be installed. I also love the global key binding feature so that I can quickly raise it with Cmd+Shift+N.

At work (more on this soon) I started using a Thinkpad x230 running Archlinux. But I sorely missed NV. I experimented with nvpy, but it didn't cut it for me at all. The tkinter UI looks bad in a Qt/GTK desktop, notes are saved in JSON by default, and the text file option is a sort of hack which stores the title in the first line, messing up the notes in NV. So rather than write my own version, I got an almost as nice, and definitely more powerful NV equivalent in Linux.

I am going to assume you use a standard desktop environment like KDE or that your window manager is EWMH compatible. You'll need:

  • To know how to define custom global shortcuts to run a command. For KDE this is System Settings -> Shortcuts and Gestures -> Edit -> New -> Global Shortcut -> Command/URL
  • gvim
  • wmctrl (available in Arch community repo).

Create a new shortcut which should launch the following command string

gvim --remote-silent +':lcd %:p:h | :au FocusLost * :wa' \
'/home/nikhil/Dropbox/Notational Data' && wmctrl -a 'GVIM'

You should edit the path to point to your Dropbox/NV directory. Now whenever you press the global shortcut combination you should see gvim with a list of all files (notes). Press Enter on a file to open it.

We use remote-silent to make sure that gvim uses an existing window if it is already open. The :lcd %:p:h option sets vim's current working directory to the NV directory. This will be useful later. We use the autocommand FocusLost to save the file whenever the gvim window loses focus (simulating NV's autosave feature). Finally wmctrl raises the window to the top by matching the string to the title. If you use gvim on a regular basis (I use terminal vim) and have other windows open, you'll have to tweak this.

So this setup is completely like NV, except for one divergence. Whereas NV searchs the note title and content together, our system will treat it as two flows. To search note titles/file names use / when in the main view. As part of my standard vim plugin set I have ctrlp and ack.vim* which will serve us well here. To always have access to note titles use ctrlp. I map it to sf so that I get quick fuzzy find. Similarly to search note contents I map sd to trigger ack.vim. This is where setting vim's current directory is important. Both plugins will use it as the base search directory.

This NV approximation is fast and works almost as well as the original, although without a slick interface. But nice fonts and a good vim colour scheme come pretty close.


* You'll need ack installed to use ack.vim. ack does not include text files by default. Put --text in ~/.ackrc to do so.

Saturday, August 25, 2012

Automatic Github Pages generation from Sphinx documentation

Sphinx is a very common documentation tool which gobbles up ReStructuredText and other free-form markup formats and outputs great HTML, PDF and other formats. It is meant for reference manuals and API documentation due to its good integration with source code (especially Python). The libuv book is written using Sphinx so that it looks so good with minimum effort.

Sphinx uses make to generate the HTML, which is great. The only problem is that deploying this to Github Pages requires multiple commands to switch branches to gh-pages, pull in the source text, then cleanup the working copy and switch back to master. This is boring after about one time, so I automated it, and I think other projects can benefit from it as well. Once you follow the instructions, running:

make gh-pages

will take the latest commit, switch to the gh-pages branch, generate HTML, push it to Github, then clean everything up and switch back to master.

NOTE: You need to commit or revert any working copy modifications before running this.

One-time commands

These steps only need to be run the first time when you want to generate Github Pages. First setup the branch to have no parents. Let me stress again the importance of making sure all changes are committed! Otherwise they’ll be lost.

$ cd repo
$ git checkout --orphan gh-pages
$ git rm -rf .
$ echo "First commit" > index.html
$ git add .
$ git commit -m "Just to create the branch."
$ git push origin gh-pages

Now the gh-pages branch is setup. We can start generating the actual pages instead of the current index.html.

Set the source files

Edit the Sphinx Makefile. Add a variable GH_PAGES_SOURCES. This should be a list of the files/directories that contain the documentation sources. This will usually be only source which contains the Sphinx reST docs, but if you are embedding external code or images, those directories have to be listed as well. In addition the Makefile has to be in the list. For the libuv book it is:

GH_PAGES_SOURCES = source code libuv Makefile

Add the target

Create a target gh-pages with the following commands (remember to use TABs in Makefiles):

gh-pages:
    git checkout gh-pages
    rm -rf build _sources _static
    git checkout master $(GH_PAGES_SOURCES)
    git reset HEAD
    make html
    mv -fv build/html/* ./
    rm -rf $(GH_PAGES_SOURCES) build
    git add -A
    git ci -m "Generated gh-pages for `git log master -1 --pretty=short --abbrev-commit`" && git push origin gh-pages ; git checkout master

Here is how it goes. The checkout simply switches branches. Then we remove all the old data to prevent any rebuilding artifacts. Since the gh-pages branch won’t have any of your original data, but only the HTML output, we need to pull the sources from the master branch. Then we generate the HTML. We move these from the build folder to the top level. Then we remove all the sources and the now empty build folder. We stage all the changes. Finally the last line generates a commit message for the gh-pages changes which is the first line of the latest commit on master and pushes to Github. The reason the git checkout master command is on the same line and semi-colon separated; if the push were to fail for some reason (network error, DAG inconsistency), I want to be returned to master in my working copy. If you don’t want this to happen, feel free to move it to a new line on its own.

Done!

You can now get back to your main task - writing great documentation. Whenever you have an urge to show it to the world, simply run make gh-pages and your latest documentation is served fresh!

Friday, August 17, 2012

Installing node.js on the Raspberry Pi Archlinux

My Raspberry Pi arrived a few weeks ago and I had some problems with getting node.js to build on it. This post is specifically about building node.js from source on Archlinux.

All activity and commands in this tutorial are run on the Raspberry Pi, either via SSH or physical keyboard. It is possible to cross-compile on your laptop/desktop for ARM, but I preferred not to in this case.

Prerequisites

Have the base-devel group installed, you should have a working gcc and friends, along with openssl and zlib. Also install python2-virtualenv and git-core.

Get the source

I usually stay on node bleeding edge so:

$ git clone git://github.com/joyent/node

Use Python2

Since Archlinux uses python3 by default, the configure and build scripts screw up. You can edit the individual files, but I find it easier to just use virtualenv, which will setup the shell environment to use python2 and its libraries.

$ virtualenv2 env
$ source env/bin/activate

Here env is the name of the directory virtualenv will use to store scripts. You can use some other name. Sourcing the activate script will set up the environment so that python will actually be python2.

Patch the source

Geoff Flarity has created a patch to tweak the build parameters a bit. You can either follow the instructions to apply the patch, or just comment the 12 vfp3:on... lines yourself, which is what I did. Also set the environment variables to build for ARM as in the README.

export GYP_DEFINES="armv7=0"
export CCFLAGS='-march=armv6'
export CXXFLAGS='-march=armv6'`

NOTE: All commands should be run in the same shell that has the virtualenv environment and the above variables set.

Use system zlib and openssl

Attempting to compile the included openssl failed on my Archlinux setup with some ARM assembly errors. Using the installed libs will also reduce the compilation time. So

$ ./configure --shared-openssl\
--shared-openssl-includes=/usr/include/openssl\
--shared-openssl-libpath=/usr/lib\
--shared-zlib\
--shared-zlib-includes=/usr/include\
--shared-zlib-libpath=/usr/lib

Build

$ make
$ su -c 'make install'

The build will take some time (30 minutes to an hour), so be patient. Once it is done you will have a fully working node runtime on your Raspberry Pi. Use it to power your home automation control server or whatever else. I use it to experiment with my DHT implementation.

The use of node.js to write low-level systems services or networking code over traditional languages like C/C++ is very interesting, because it provides a safer, garbage-collected runtime, with efficient I/O and a less verbose language. Inexpensive devices like the Raspberry Pi allow experimenting with multiple devices or peer-to-peer configurations rather than being bound to only localhost testing for those on a tight budget. So get a Pi and have fun.

Friday, July 13, 2012

Europe2012: Helsinki

I landed in Helsinki on the 26th of June from a connecting flight via Frankfurt. As you’ll see in the rest of the journey, food is a very integral part of my life, and I can’t resist describing airplane food either. So in Lufthansa, on the BOM-FRA flight, they served this decent croissant and omelette with spinach and chicken for ‘breakfast’. Fruits in planes are always shit, and this was no exception.

This was my first time at Frankfurt as a transit point. They make you wander a lot to get to passport control. For a second I thought passport control wasn’t going to happen at port of entry. Then the immigration officer gave me another scare by being very scrutinizing, checking all my credit/debit cards and my dad’s permission letter. Yay! for having all my documents in order.

Finally being let through, the FRA-HEL flight was again Lufthansa. I love day flights for their take-offs and landings where you get amazing views of the land. This was no different with the plane descending as it left the shores of the north sea near Germany and then approached Helsinki-Vantaa International Airport.

DSC02709

In flight meal was a delicious ‘American club sandwich’ which was bacon and chicken with mayo in rye bread. I’ve had rye bread every time I’ve been to Europe since 2010, and I love that stuff. It has great texture, a sweetness that develops in the mouth and complements meat very well.

HEL is located quite some distance from the main city as it serves the greater Helsinki region. The first thing I do when I land in a European city is to buy a pass for public transport for the number of days I am going to be staying. A citizen of Mumbai, I love public transport and passes turn out to be very cheap all over Europe. So just blindly buy one if you plan to explore cities. In this case the machine didn’t have change so I bought a one day pass then bought another one the next day. Passes printed by a machine are on paper. You can buy travel cards or seasonal passes from major terminals, tourist points and most conveniently from R-kioski general stores. These green cards are very useful and easy to use. They are available in single region (Helsinki only), or 2 and 3 region varieties, although the price difference isn’t much. Overall, I ended up paying EUR 36 for 4 days of unlimited travel in 3 regions. If you think that is a lot, consider this. The pass allows travel on the entire HRT network, bus, tram, metro and rail. In addition, the Suomenlinna ferry operated by HRT is included. In EUR 36 I roamed about the city, visited a major tourist attraction and went all the way to Nuuksio national park in Espoo! But I’m getting ahead of myself. Back to the airport. The regional bus 615 leaves every 15 minutes and will take you to Helsinki Central Station from where transport lines go all over the city.

Bicycles are common in Helsinki and bike lanes exist but aren’t sharply delineated, so make sure you don’t treat a bike path as the pavement. While riding bikes on the pavement is frowned upon in San Francisco, it is fairly common in Europe to ride on the pavement when a bike path does not exist. It also isn’t so much of a hindrance with the super-wide pavements that are so common in Europe.

I stayed in Hostel Erottajanpuisto, which is on Uudenmankatu (katu is Finnish for street). Take the 3B tram from Helsinki Central Station and get down at Frederikinkatu or Iso Roobertinkatu and walk to the hostel. It is a nice, clean place. There are 4 toilets and 4 showers on the hostel floor. My room was a 6-bed dorm. Everything was clean and the staff were very helpful. Prices were EUR 27 + 30 + 30 due to the European Athletics Championships which began from June 27th.

DSC02716

That evening I was pretty tired and just wandered the city. First I went to Verkkokauppa, which is one of Europe’s largest electronics store. I didn’t find much there that I could afford :P, so I just went upstairs to the viewing gallery on the 7th storey which gives great views of Helsinki, especially the West harbour. It also has a real MIG-21 plane on display.

DSC02725DSC02726DSC02728

From there I came back to the city centre, and wandered down Esplanadi, which is the cities main promenade. Halfway down Esplanadi is a cafe and the area across it has a stage for performances. A seniors band was performing that day though I only stopped for one song. At the end of Esplanadi is Kauppatori, an open air market which would be the source of culinary delights. Sadly I arrived late (it closes at 18:00) and missed it the first day. Slightly disappointed, I wandered around Keskuskatu which is the central square. The area around Helsinki Central Station is full of high-end shops and departmental stores and is fun to walk about. I ended up eating at some place called Chilly’s (salmon and fries with salad) near the station (I can’t find it on Google Maps now) when I got really hungry and couldn’t find something nice. Tired from the flying and walking, I came back to the room and crashed. Well after the daily routine of backing up the photos.

DSC02732

On day 2, I was all eager, it was time to go to Suomenlinna! But before that I needed breakfast and a 3-day pass. R-kioski sells both. I had a nice chicken and bacon sandwich and mint-flavoured coffee sitting on a bench at South Harbour.

DSC02735

It isn’t everyday that you get to have such a beautiful view in the morning. Now the day pass (You can get multiple days too). The HRT has a green colour card for tickets. The card is coded with information, and gray readers on all modes of transport do their job. Each reader has a quadrant, with 0/L, 1, 2, 3 marking each quadrant. Now, the numbers represent how many regions you want a ticket to be valid in. If you are a resident who has a balance on the card you have to do some button pressing for zone selection. But with a day pass we don’t need to bother with that. If you bought a 3-day, 3-region pass, then you can go anywhere in 3 days. All you’ve to do is hold the card to the reader when you get in. If everything is fine, the green light will switch on, accompanied by a beep. If things are not right, well I guess you’ll have to find out. Its very simple, so don’t get confused by the numbers. But make sure you aren’t travelling in a zone where the ticket is invalid. If you just want to see Helsinki, a 1-region pass is enough, it covers Suomenlinna too. But it does not cover the airport, so you should buy a separate ticket for that. I bought a 3-region pass as I would be visiting Nuuksio.

Suomenlinna, literally the ‘Castle of Finland’, is a island to 2km to the south of Helsinki, part of the large Finnish archipelago. The Suomenlinna ferry leaves from South Harbour every 20 minutes. On the way there are several smaller islands on which lucky people have houses.

DSC02746

You can see the attractive but short skyline of Helsinki as you leave the mainland and be amazed by Scandinavian cleanliness and efficiency. On Suomenlinna there are a few cafes, a few points of interest and the fort at the end. On the way to the visitor centre at the middle of the island you’ll already pass the church and its gardens. The blue path on the map (get one from the Visitor’s centre, or follow the blue sign boards) is the ‘suggested path’, but I wandered of in 2 directions not suggested. If you take a right as soon as you cross the bridge near the visitor’s centre you’ll reach a building in which they are building a wooden gunboat using traditional tools and techniques. It’s not open yet but you can go in through the door, just don’t creep out the workers by taking too many pictures. Continue on and you’ll reach the marina, which has a very nice collection of small boats, and the church in the background. On a sunny day it is a very nice sight. Which is why the Finns have put a cafe there as well, because in the summer you can enjoy that sight all day. Return to the blue path, but stick to the right after leaving the tomb, and take the route between points 6 and 22 on the map (the little gate in the wide building) and go towards 4. Here you’ll see the cannon emplacements, ducks swimming in the pools and a small (about the size of a big truck) artificial beach tucked away. I was lucky to also spot a lone paraglider riding the nice updrafts generated by the sea breeze.

DSC02787DSC02838

By this time you’ll have walked a lot and must be pretty hungry. But, with a budget of EUR 20 for a day we aren’t going to be dining at any of these sit down cafes. So I just went to the restroom (probably shouldn’t be going into this much detail), then sat for a while at the King’s gate.

DSC02876

There is some very nice fort design at work near the Gate to ambush ships. On the way back you can explore the little park, or not. All the good planning of Suomenlinna was due to its architect, Augustin Ehrensvärd, who cared about his soldiers. You’ll learn this if you watch the short movie screened in the visitor centre (English at 12:30). That and the museum together will set you back EUR 6.50. There is also Wi-Fi in the visitors centre and some nice souvenirs though I don’t buy any. This is because most souvenirs are just Made in China these days.

So… keeping the idealogy aside, I’ve managed to give a run down of the place in one paragraph! What do I do now!? Well, the bid to save money does not stop me from being able to pass up lemon-liquorice icecream. So I had one at the shop near the church and got a huge scoop for 2.80. Now I could hold on till I made it to the mainland.

DSC02915

A note about liquorice. Liquorice is like, well, something. You either love it or hate it. I first had it in 2001 and I’ve loved it. In 2010 I was unfortunate to try salmiakki, since then I stick to the less salty variants :) The Finns (call it Lakritsi) and the Dutch (call it Drop) love liquorice and you can find it in every decent general store. Buy some, try some. My favourite is the plain black unflavoured, slightly sweetened cylinders. I got mine in some yellow packet (400g for EUR 3 or so), but there are a lot of brands and flavours.

While you were thinking of liquorice, I finished my icecream and the ferry was back to South Harbour. Behold the wonderland that is Kauppatori.

DSC02737

Kauppatori is an open market similar to most European cities, with local food stalls. In Finland that means Salmon, Vendaces, Calamari, Reindeer sausages and Moose sausages. Kauppatori was to become my lunch spot all three days. On the first day I had salmon with blue cheese, with a side of vendaces, calamari and veggies (EUR 15).

DSC02923

I thought that was expensive, but it was so huge that I kept half of it and had it for dinner. I also got half a litre of cherries for EUR 3. They were the best cherries I’ve ever eaten, much bigger than the cherries in India. They were also extremely sweet and I had great fun munching on them while walking the streets.

After lunch I went to Linnanmaki amusement park. Going to a amusement park is not something you may do in a foreign country, except perhaps Disneyland. But, India has no decent amusement parks, and this one looked good. To reach there take the 3B tram to Alppila stop and walk about 500m in the direction the tram will go. A day pass is EUR 37 and gets you on all the rides as many times as you want. I just went to the 6-7 most extreme rides. Rain prevented me from going on the best one - Ukko - so I paid EUR 5 to extend my pass to the next day. Completely bushed by now, it was time to take the 3B back to my room.

On day 3 it was time for something completely off the tourist map. On the outskirts of Espoo is Nuuksio National Park. It has some nice trails through the wilderness of conifer forests and Finnish lakes. With a 3 region pass, you can go all the way to Nuuksio for ‘free’. You can take the S, U, L or E trains to Espoo then take bus number 85. Get down at Nuuksionpaa or Kattila (last stop). Once in the countryside the stops don’t have their names written on them, so it’s best to just get down at Kattila. From there you can see the trail marked. There are two, red and blue. Red is about 4km and goes to the main park entrance at Haukkalammentie. The blue one is 8km and I don’t know where it ends up because I didn’t take it. I had fun traipsing through the park for about 2 hours.

DSC02978DSC02948

Finland is a pretty flat country so there aren’t any hikes, just walking. There’s silver birch, spruce, alder, aspen and lime trees and two lakes on the trail. Three-fourth of the way through, you’ll come to a fork, one going left and the other right over a wooden bridge. The signs here have fallen into the lake and the trail is unmarked for a while. So take a left to stay on the red trail. At Haukkalamppi there is a info cabin with details about the indigenous wildlife and vegetation if you are so inclined. There is also drinking water and, surprisingly, a gift shop. Walk 2 km along the paved road to reach Nuuksionpaa from where you can catch the 85 back.

From Helsinki Central Station it was back to Kauppatori. This time I tried the sausage mix (EUR 8).

2012-06-28-010

I particularly loved the reindeer, which is dense and similar to beef. This was topped off by fresh blueberries (EUR 5). From there I went to Linnanmaki to ride the best roller coaster and try the other rides again. The Ukko takes you up five storeys, then sends you straight down vertically, to go all the way up the opposite face, then go back down in reverse and up five storeys again (in reverse!) then down again and up again where the hydraulics kick in and slowly lower you to ground level. It is super and there are correspondingly large lines, but it is well worth the wait and the rain.

The final day was a bit tempered. I had seen everything I wanted to see (or so I thought) so I just wandered around Kauppatori, Kauppahalle (the gourmet product hall south of Kauppatori), Stockmann and co. Picked up some gooseberry jam, some Fazer chocolate and a pack of plain liqourice. I accidentally wandered onto Sofiakatu and Helsinki’s main square.

DSC03026

Just before that is the museum which had a Finnish films exhibition. It was free so I saw some of it then took some photos of the main square. It was surprising that I forgot about this, of course there is nothing very interesting, they are just nice buildings. Then I went into Asematunneli complex but there wasn’t much there and I left soon. After this I was really but had a while to go for my ferry, so I just spent some time sitting on a bench at Esplanadi, nibbling on chocolate, had reindeer meatball lunch and then went back to the hostel, took the bags and walked to Makasiiniterminaali where the Linda Line runs to Tallinn in 1.5 hours. Ferries run regularly, with fares being in the range of EUR 25-45 depending on season, day and time. My ferry on a Friday at 14:00 was EUR 44. Book online since on the spot booking has a EUR 5 surcharge.

2012-06-29-019

Helsinki had been amazing, it was the first stop on my tour and Scandinavia was well worth it! Next stop Tallinn, Estonia to attend two days of Akademy 2012…